
Monday, December 16, 2013
Side-Tracked: Recent Haul of KOs (156) - (Slightly Undersized) KO G1 Thundercracker
Saw this blue colour KO G1 Thundercracker and decided to get it (I think...) Cost $2.90 only... Still deciding to make this into the blue rain-maker seeker or a G1 toy-accurate Thundercracker...


Sunday, September 29, 2013
Side-Tracked: Recent Haul of TFs (155) -Takara Tomy (Deluxe) Orion Pax
Gotten this at the basement of CSC today... Takara Tomy (Deluxe) Orion Pax... At $20, I thought I could still have a place for my shelves of Optimus Primes... Hahaha...

Upon opening the box then I realised that I have to assemble the Arms Micron figure (or something like that, I don't know what their names are...) myself.. Will do that next time... The inner box seem to look like a tomb for Optimus...

Not yet stickered.... but looks good!


Upon opening the box then I realised that I have to assemble the Arms Micron figure (or something like that, I don't know what their names are...) myself.. Will do that next time... The inner box seem to look like a tomb for Optimus...

Not yet stickered.... but looks good!

Wednesday, August 14, 2013
Minor Update: Bootleg G1 Terrocons
Suspect this set is one of the factory rejects (maybe failed QC..????), if there is such checks for TF bootlegs.... After some trimming and attempts to "perfectize" the Terrocons, a good enough Abominus is born... Hahaha... Joints are relatively tight enough, not too bad...

Big headed Abominus, so weird... Finally a "complete" Abominus (as compared to the cheap KO one that has 2 Technobot limbs)...

Edit: Update picture of the stickers applied...


Big headed Abominus, so weird... Finally a "complete" Abominus (as compared to the cheap KO one that has 2 Technobot limbs)...
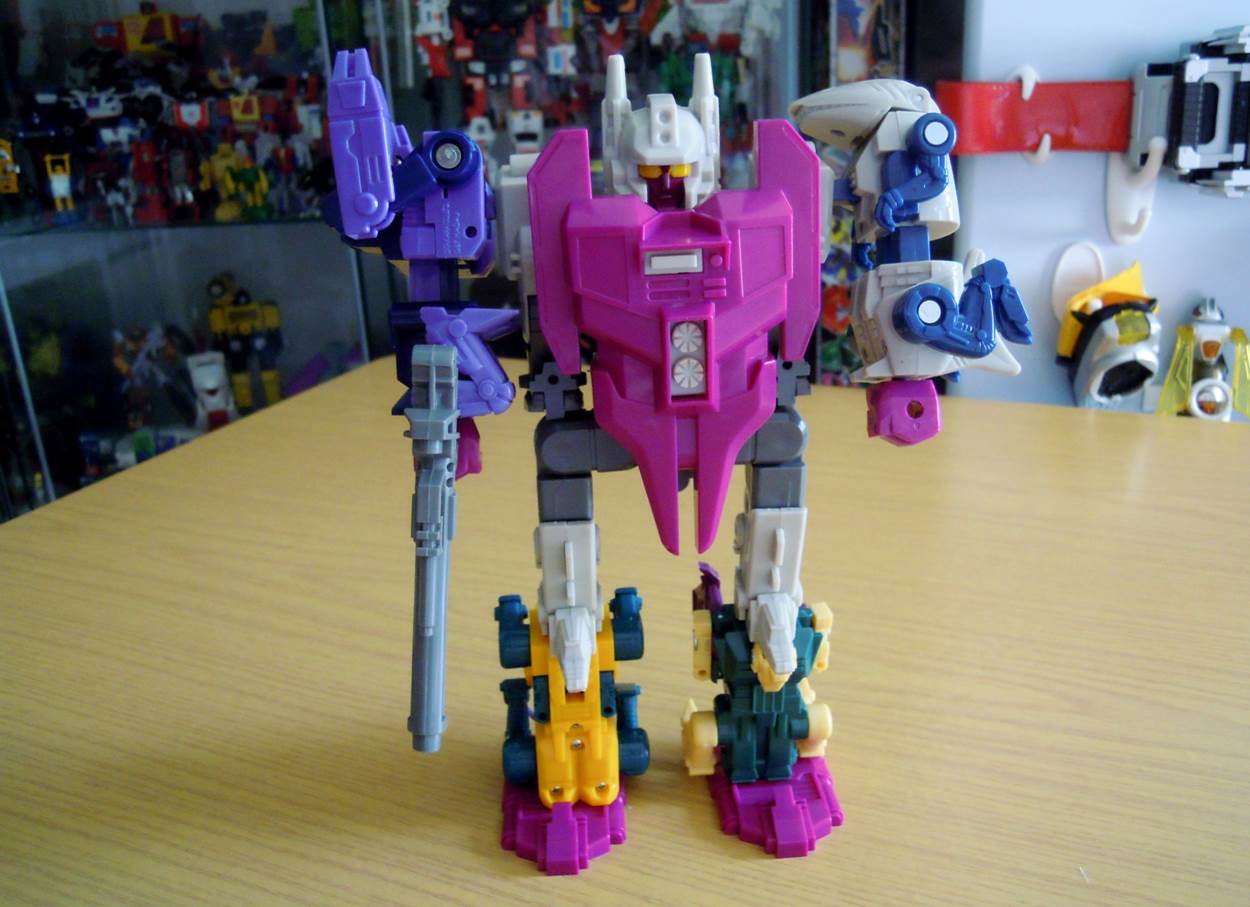
Edit: Update picture of the stickers applied...


Saturday, August 10, 2013
Update: Junkion Blacksmith JB-07 Power of Destruction
Took some time to fix up my old spare set of cheapo KO G1 Constructicons. This old KO set is slightly different from my 1st KO set of cheapo Constructicons which have the actual Decepticons insignias instead of modified one... and this set seems to have slightly thicker plastics, which makes it very tight when fitting into the Junkion Blacksmith add-ons... They look slightly greener a bit too... Took quite some time to fix up, and along the way some joints broke too... Anyway, the end results are not too bad... Just sad that the Scrapper-leg seems a bit too long... or maybe the Mixmaster-leg is a bit too short... This makes it difficult for Devastator to stand... Tried fixing Scrapper to have shortened torso but not successful... Actually I somehow am able to make my old KO G1 Constructicons (Devastator) manage to do stand with official Scrapper-leg transformations...
Here's how the original KO Devastator looks in comparison with the Junkion Blacksmith add-ons version...

I personally like this set of add-on when fixed on, this makes Devastator looks much like what he is supposed to look like, as a proper big robot with limbs (thighs)... Nice cartoon head too...

And now Devastator can pose!!!! Hahahaha.... So tempted to remove all the stickers...

Here's how the original KO Devastator looks in comparison with the Junkion Blacksmith add-ons version...

I personally like this set of add-on when fixed on, this makes Devastator looks much like what he is supposed to look like, as a proper big robot with limbs (thighs)... Nice cartoon head too...

And now Devastator can pose!!!! Hahahaha.... So tempted to remove all the stickers...

Sunday, July 28, 2013
Side-Tracked: Recent Haul of KOs and Such (154) - KO G1 Kabaya Starscream, Junkion Blacksmith JB-07 Power of Destruction, Bootleg G1 Terrorcons, Bootleg G1 Technobots
Haul from Taobao.com came yesterday!
KO G1 Kabaya Starscream
Wow, finally found a cheap KO G1 Kabaya Starscream kit, nice... hope the colours don't come out too weird...Cost approx. $10.25...


Junkion Blacksmith JB-07 Power of Destruction
Add-on to my 2nd set of cheap KO Devastator! Hope the joints are ok... Cost approx. $30.30... Strangely the poster was wrapped outside the box, not inside... Wonder if this is the norm...

Bootleg G1 Terrorcons
Finally gave in the temptation and bought this set and also their rival, Technobots (bootleg version, of course)! Was a bit hesitant to buy at first, as many, if not all, sellers in Taobao.com sell this set loose without box, but in the end still bought a set... Plastic spruces are not cut off cleanly, but no worries, will do that personally... Have not really transform them yet, so not sure of their quality... Cost $73.85... Happy....


Bootleg G1 Technobots
Yes!!!! With this, I will (sort of) complete the G1 (US version) Scramble-City style gestalts... This set costs $110.25...


KO G1 Kabaya Starscream
Wow, finally found a cheap KO G1 Kabaya Starscream kit, nice... hope the colours don't come out too weird...Cost approx. $10.25...


Junkion Blacksmith JB-07 Power of Destruction
Add-on to my 2nd set of cheap KO Devastator! Hope the joints are ok... Cost approx. $30.30... Strangely the poster was wrapped outside the box, not inside... Wonder if this is the norm...

Bootleg G1 Terrorcons
Finally gave in the temptation and bought this set and also their rival, Technobots (bootleg version, of course)! Was a bit hesitant to buy at first, as many, if not all, sellers in Taobao.com sell this set loose without box, but in the end still bought a set... Plastic spruces are not cut off cleanly, but no worries, will do that personally... Have not really transform them yet, so not sure of their quality... Cost $73.85... Happy....


Bootleg G1 Technobots
Yes!!!! With this, I will (sort of) complete the G1 (US version) Scramble-City style gestalts... This set costs $110.25...


Wednesday, July 10, 2013
Remake - G1 themed Wildrider
Trying to replace my KO Menasor with proper... eh... car-limbs... so will be repainting a spare KO Breakdown into Dead End (to do after buying a maroon color paint pen), and "convert" the KO Lightspeed into a Wildrider...
In progress picture... Some parts are filed down to allow more space so that parts will not rub against each other and scrape off the paint when transforming...

Comparison picture to show the vehicle modes...

Transform! Comparison picture to show the robot modes... Opps, used an old picture that still has yellow headlamps, have since painted them to grey (see car mode picture above)...

In progress picture... Some parts are filed down to allow more space so that parts will not rub against each other and scrape off the paint when transforming...

Comparison picture to show the vehicle modes...

Transform! Comparison picture to show the robot modes... Opps, used an old picture that still has yellow headlamps, have since painted them to grey (see car mode picture above)...

Thursday, June 27, 2013
Update: TF Generations Springer and Blitzwing - Repair / Mod
TF Generations Springer - Repair
My TFG Springer has a weird left ankle that will just not lock the foot to the front, and I thought maybe the part needs some repair. But after prying open the pin and ankle-cover, I realized it is a assembly-line error: a right ankle-cover was used as the left ankle-cover... So I have to cut off the existing male-peg connector and try to glue to the other side, and hope it works...

I used super-glue to glue the part in place and also use some tissue papers mixed inside the glue as reinforcement fillings to fill up any gaps... Once dried and hard, I use a small penknife and needle files to get to shape...

To assemble, I hammer the pin back and test. Nice!!!!! Now the foot can be moved to the front and locked in place!!!

TF Generations Blitzwing - Repair & Shoulder Mod
MyTFG Blitzwing's left leg is very loose, and I realized that it is due to the pin not fully hammered in... So I decided to use a pair of long-nose pliers (with the help of a small nut, small enough to fit into the cavity which houses the pin) and press the pin in. The leg is now tighter, but I am not sure how long it will last, since the tank-transformation requires the pulling of the legs, which might likely to loosen the joint (hopefully not..)...

As with the common batch of Blitzwings sold in the market, mine had the shoulder problems. So I followed 1 of the methods shown in Youtube (a quick search in Youtube will bring you there) and cut out 2 styrene pieces (1 mm thickness, approximately)...

... to be attached to the inner-rears of the body... As usual, I attach them using super glue...

... and test out... Works!!! Though still need to use Peaugh's method to slightly pull both arms out to ensure the arms-piece is in the centre position of the body. My right shoulder is a teeny-weeny looser than the left's, which is again mentioned in the Youtube clip's owner that his is also much worse in that side (something like that)... But hey, if it works, it's good enough!!!!

If left unpainted, only a thin line can be seen. However, I will still like to paint it...

...After painting... Sadly, my violet paint is not as dark as the body colour, and photos taken with flashlight will show it even more... But still, not too bad, and much better than white...

... The left shoulder...

Oh, and I also shaved off a little of the nosecone joint to allow the nosecone to tilt more align to the body, thus allowing the tank's gun-barrel to be more vertical, in robot mode...

... and fiddled with the jet mode, and realized that I actually prefer this configuration of the gun-barrel in jet mode... somehow it covers up the cavity found in between the 2 "arms"... though the barrel looks like it is sticking out a little too much... However, if I stack the sword and gun and put them onto the barrel, the whole jet looks too high...

Anyway, some pictures of the 2 TFG triple changers... Air vehicle mode...

Land vehicle mode.... Wait... the tank is smaller than the amoured car???...

An extra shot to "boast" that for TFG Springer's car mode, the 2 x side green covers can be fitted in seamlessly with the centre green cover, if the centre green cover piece is not pressed down to deeply into the peg-hole (yellow)... Try that out yourself! It looks great without the seams!!!

And finally, the robot modes... These 2 TFs are so well in aesthetic-design, they looked more like those typical 3rd-party TFs than official Hasbro ones... Sweet...

My TFG Springer has a weird left ankle that will just not lock the foot to the front, and I thought maybe the part needs some repair. But after prying open the pin and ankle-cover, I realized it is a assembly-line error: a right ankle-cover was used as the left ankle-cover... So I have to cut off the existing male-peg connector and try to glue to the other side, and hope it works...

I used super-glue to glue the part in place and also use some tissue papers mixed inside the glue as reinforcement fillings to fill up any gaps... Once dried and hard, I use a small penknife and needle files to get to shape...
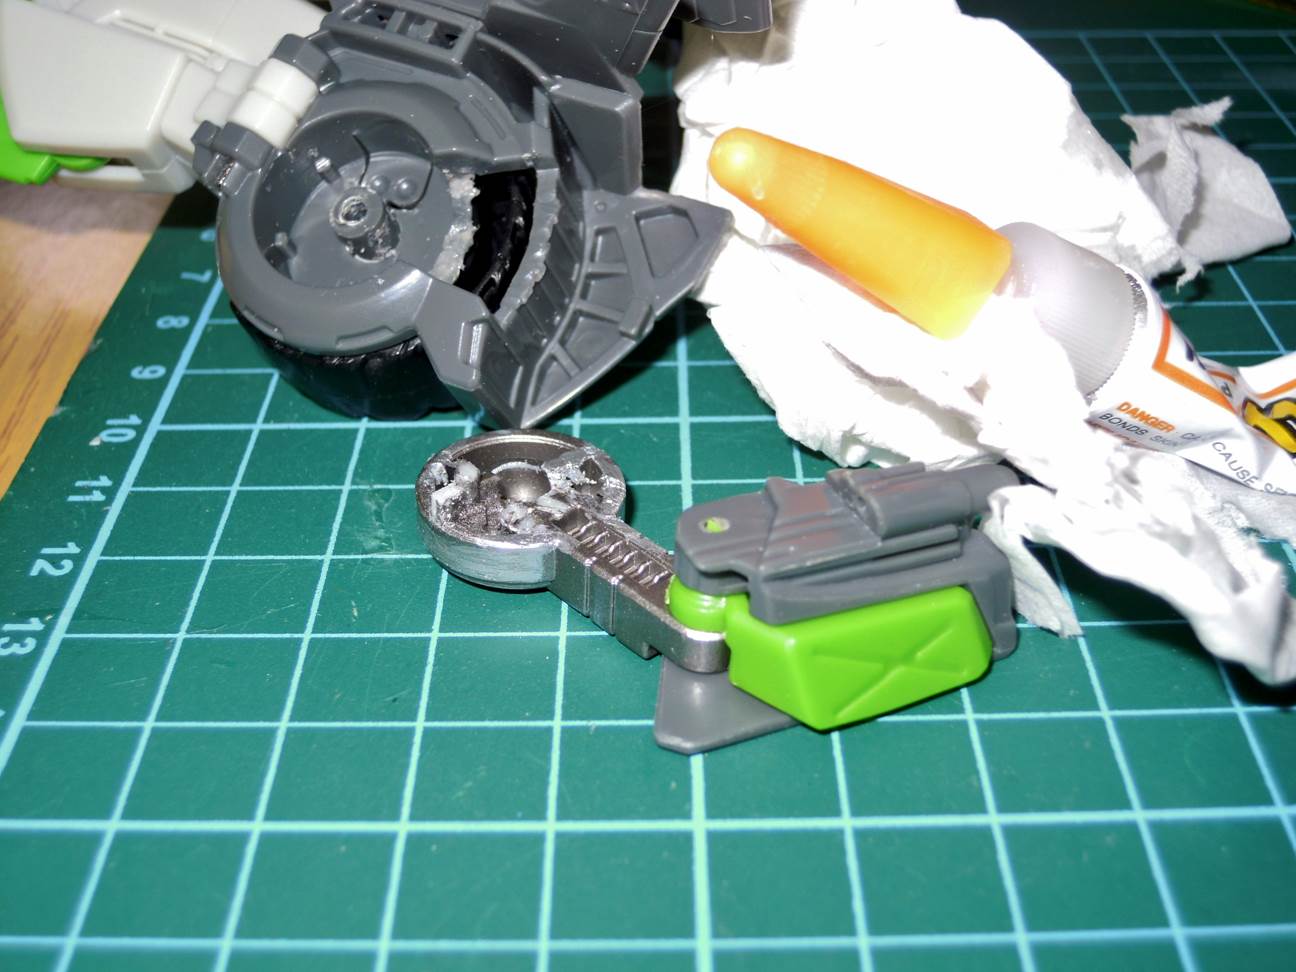
To assemble, I hammer the pin back and test. Nice!!!!! Now the foot can be moved to the front and locked in place!!!

TF Generations Blitzwing - Repair & Shoulder Mod
MyTFG Blitzwing's left leg is very loose, and I realized that it is due to the pin not fully hammered in... So I decided to use a pair of long-nose pliers (with the help of a small nut, small enough to fit into the cavity which houses the pin) and press the pin in. The leg is now tighter, but I am not sure how long it will last, since the tank-transformation requires the pulling of the legs, which might likely to loosen the joint (hopefully not..)...

As with the common batch of Blitzwings sold in the market, mine had the shoulder problems. So I followed 1 of the methods shown in Youtube (a quick search in Youtube will bring you there) and cut out 2 styrene pieces (1 mm thickness, approximately)...

... to be attached to the inner-rears of the body... As usual, I attach them using super glue...

... and test out... Works!!! Though still need to use Peaugh's method to slightly pull both arms out to ensure the arms-piece is in the centre position of the body. My right shoulder is a teeny-weeny looser than the left's, which is again mentioned in the Youtube clip's owner that his is also much worse in that side (something like that)... But hey, if it works, it's good enough!!!!

If left unpainted, only a thin line can be seen. However, I will still like to paint it...

...After painting... Sadly, my violet paint is not as dark as the body colour, and photos taken with flashlight will show it even more... But still, not too bad, and much better than white...

... The left shoulder...

Oh, and I also shaved off a little of the nosecone joint to allow the nosecone to tilt more align to the body, thus allowing the tank's gun-barrel to be more vertical, in robot mode...

... and fiddled with the jet mode, and realized that I actually prefer this configuration of the gun-barrel in jet mode... somehow it covers up the cavity found in between the 2 "arms"... though the barrel looks like it is sticking out a little too much... However, if I stack the sword and gun and put them onto the barrel, the whole jet looks too high...

Anyway, some pictures of the 2 TFG triple changers... Air vehicle mode...

Land vehicle mode.... Wait... the tank is smaller than the amoured car???...

An extra shot to "boast" that for TFG Springer's car mode, the 2 x side green covers can be fitted in seamlessly with the centre green cover, if the centre green cover piece is not pressed down to deeply into the peg-hole (yellow)... Try that out yourself! It looks great without the seams!!!

And finally, the robot modes... These 2 TFs are so well in aesthetic-design, they looked more like those typical 3rd-party TFs than official Hasbro ones... Sweet...

Subscribe to:
Posts (Atom)